WARNING: I ASSUME NO RESPONSIBILITY FOR ANY DAMAGE YOU MAY CAUSE TO YOUR LENS WHEN DOING THIS MODIFICATION. IF YOU PROCEED, YOU ARE DOING IT AT YOUR OWN RISK! THE LENS MODIFIED WAS A NIKON MOUNT VERSION, BUT IT WILL ALSO WORK ON THE CANON MOUNT VERSION – MORE ON THAT LATER.
1) Gently remove the rubber on the focus ring using a bent paper clip. With your fingers, gently pull the rubber ring towards the back of the lens e.g. on top of the zoom ring. Try not to pull too hard and move the rubber ring bit by bit to avoid stressing the rubber.
2) Moving the rubber of the focus ring reveals a line of thin black tape. Remove it making sure not to damage it, as you will need to reapply the tape later.
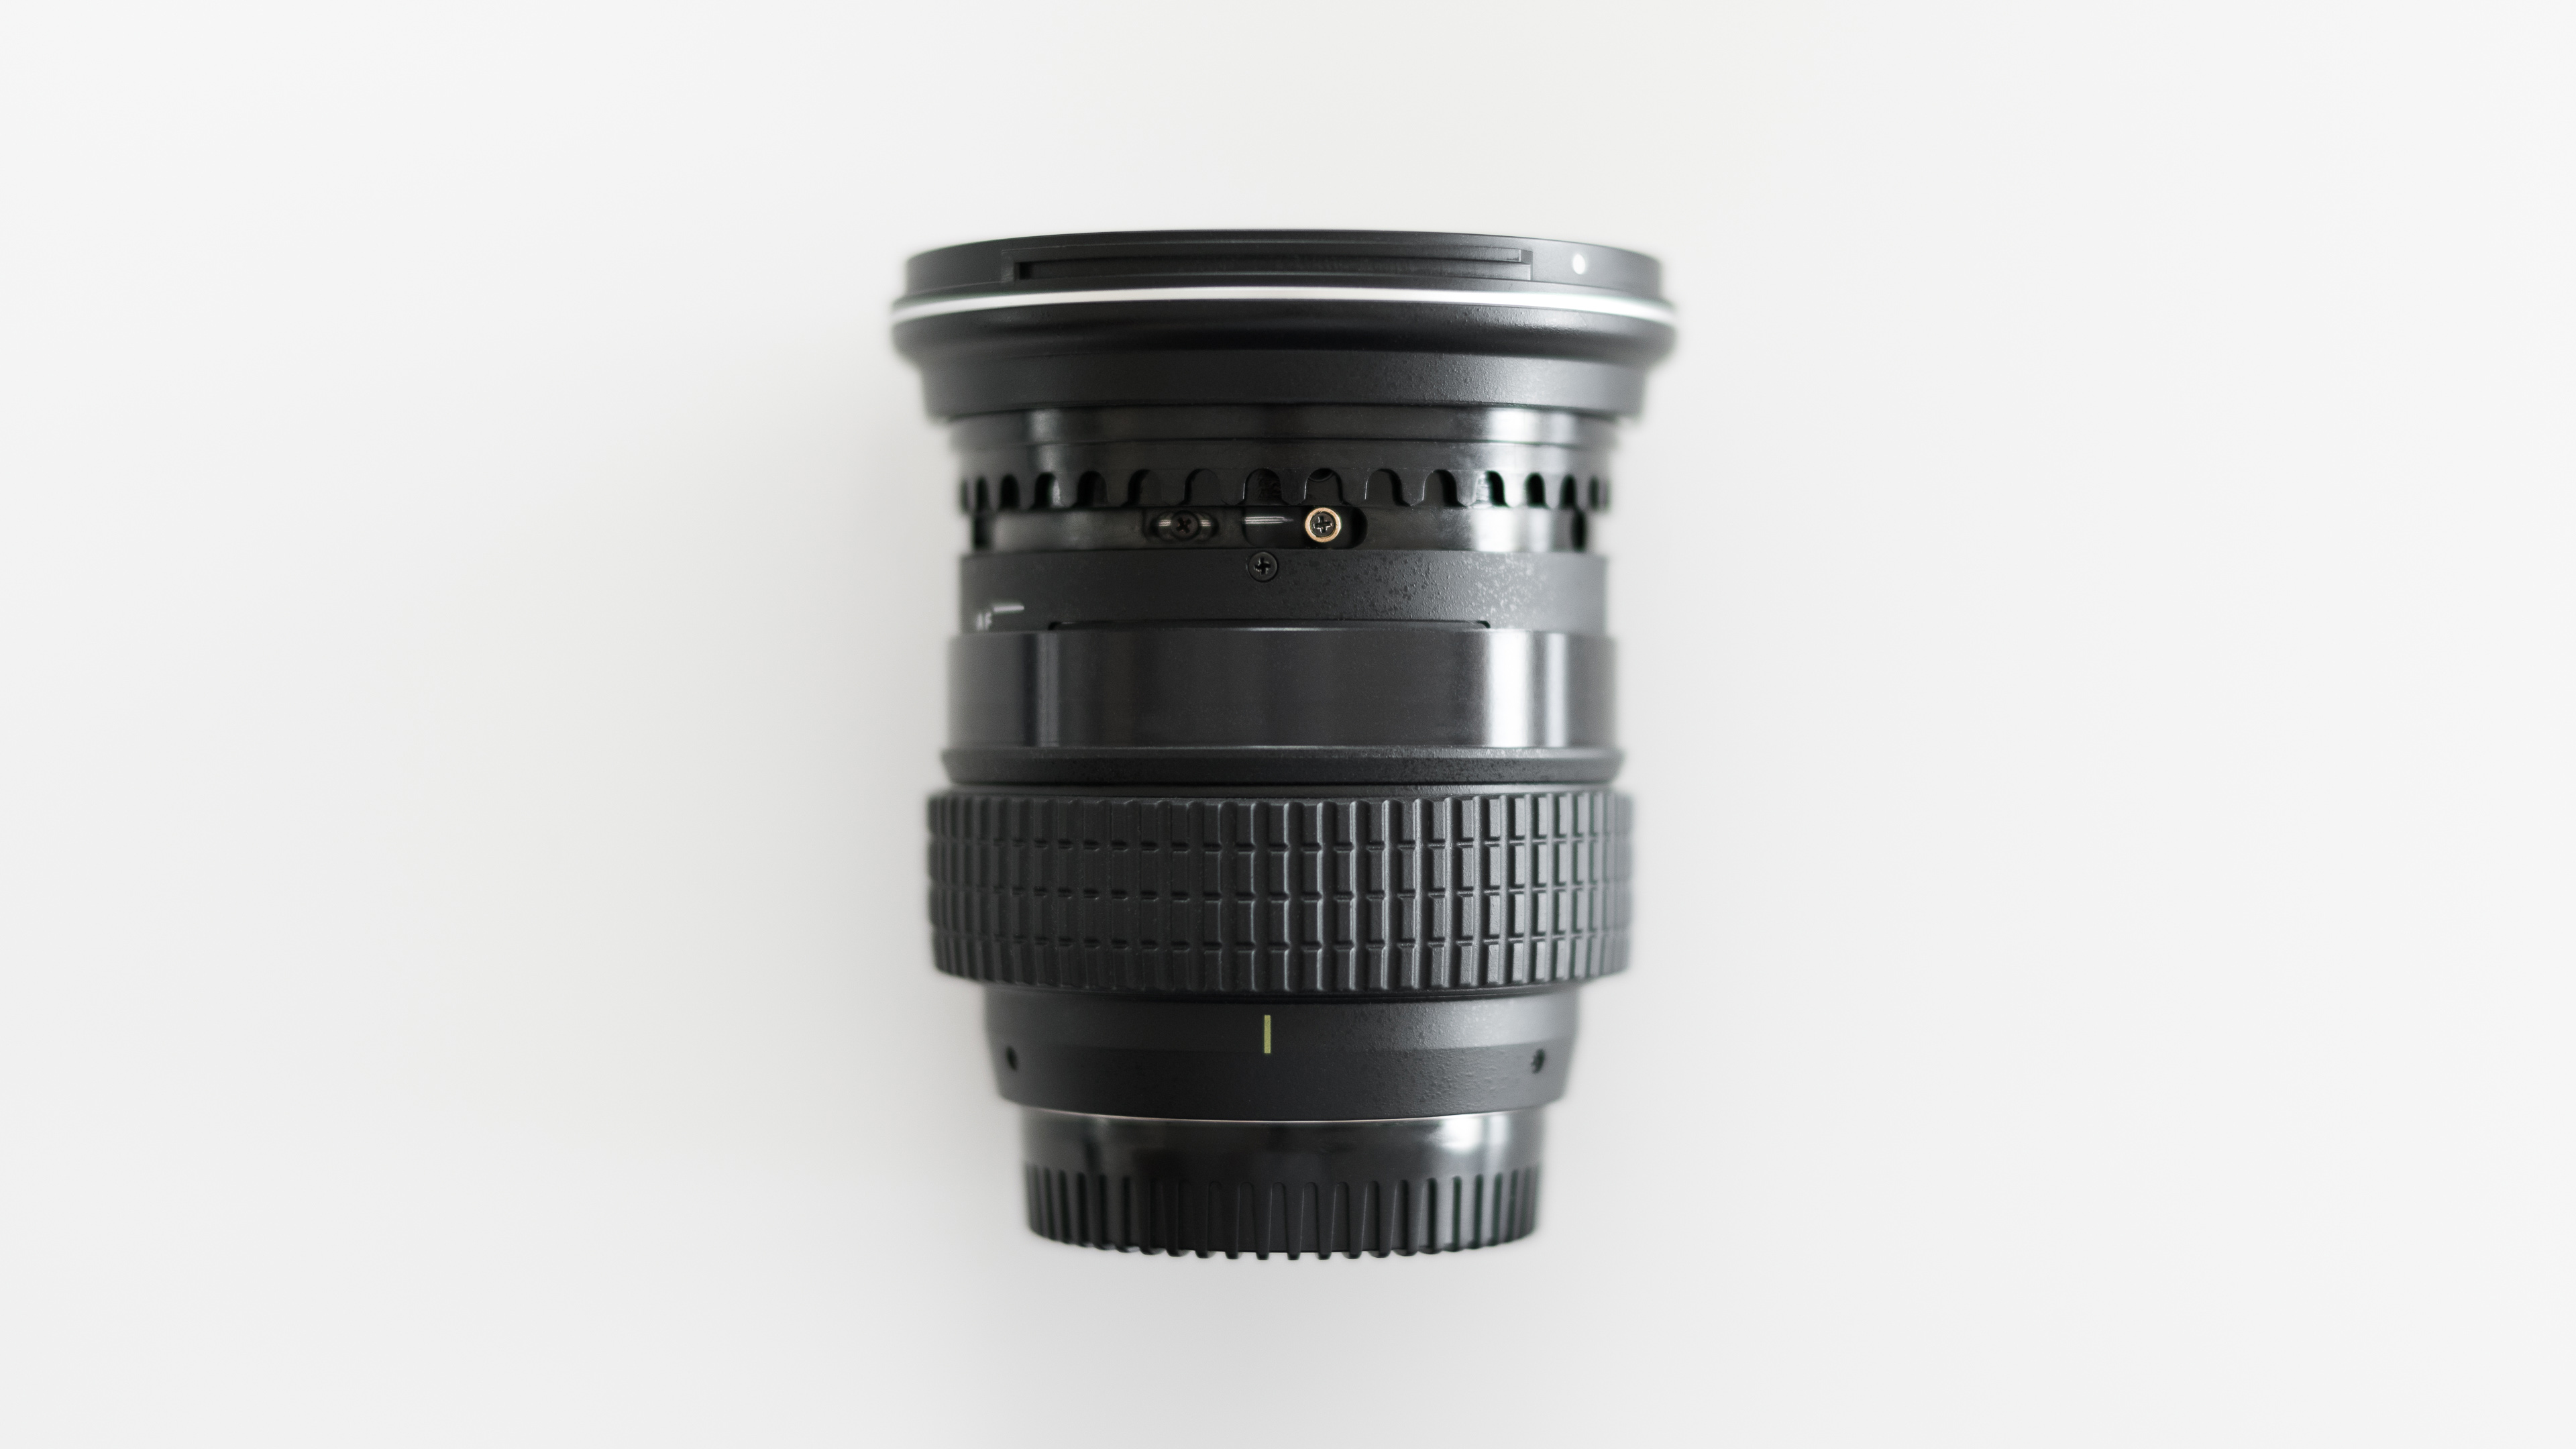
3) Removing the tape reveals that the focus ring is divided into two parts. Pull down the lower part. It should come off and you should be able to temporarily slide this lower part on top of the lens body just below, covering the Tokina logo and distance meter, as it is shown in the image below. Make sure not to scratch the lens body when doing this. Leave the screws with the golden outline where they are, these are not the ones to adjust!
4) After separating the two parts of the focus ring, you need to make sure that for the next step, the upper part of the focus ring is pushed upwards (as if you were shooting in AF mode). 3 recessed screws should now be visible. By default, the three screw holes were in the middle of the oval adjustment holes on my lens (see image of the oval below). Remove the three screws and adjust the ring by pushing the screw holes to the right hand side (front of the lens facing forward) on the Nikon-mount version, and to the left hand side on the Canon-mount version. This is because focus rings on Canon-mount lenses rotate the other way around. I used a small screw driver to do this – Pushing one of the screw holes will move the other two as well, as an inner part of the lens is being rotated. It might be hard to move at first. I had to move it back and forth a bit. However, make sure not to move the screw holes too far, so you can’t reach them!
5) Once you have managed to adjust the placement of the screw holes, put all three screws back into their holes and reassemble the lens. Move the lower part of the focus ring back into its place, reapply the tape and put the rubber grip back over the focus ring.
1 Comment